Azure Cost Tracking Guide
Overview
This documentation provides a step-by-step guide on how to register Azure cloud provider for cost tracking with Turo.
Get Azure credentials for cost tracking
- Register an application with Microsoft Entra ID
- Assign a role to the application
- select subscription
- Select
Access control (IAM). - Select
Add, then selectAdd role assignment. - In the Role tab, select the role you wish to assign to the application in the list.
- Select
Next. - On the Members tab, for Assign access to, select User, group, or service principal.
- Select
Select members. By default, Microsoft Entra applications aren't displayed in the available options. To find your application, search for it by name. - Select the
Select button, then selectReview + assign. - Your service principal is set up. You can start using it to run your scripts or apps.
- Create client secret
- Browse to
Identity>Applications>App registrations, then select your application. - Select
Certificates & secrets. - Select
Client secrets, and then selectNew client secret. - Select
Add. - Once you've saved the client secret, the value of the client secret is displayed. This is only displayed once, so copy this value and store it where your application can retrieve it, usually where your application keeps values like clientId, or authority in the source code. You'll provide the secret value along with the application's client ID to sign in as the application.
- Browse to
Note : (for PMck Azure user this guide)
Register azure cost in Turo
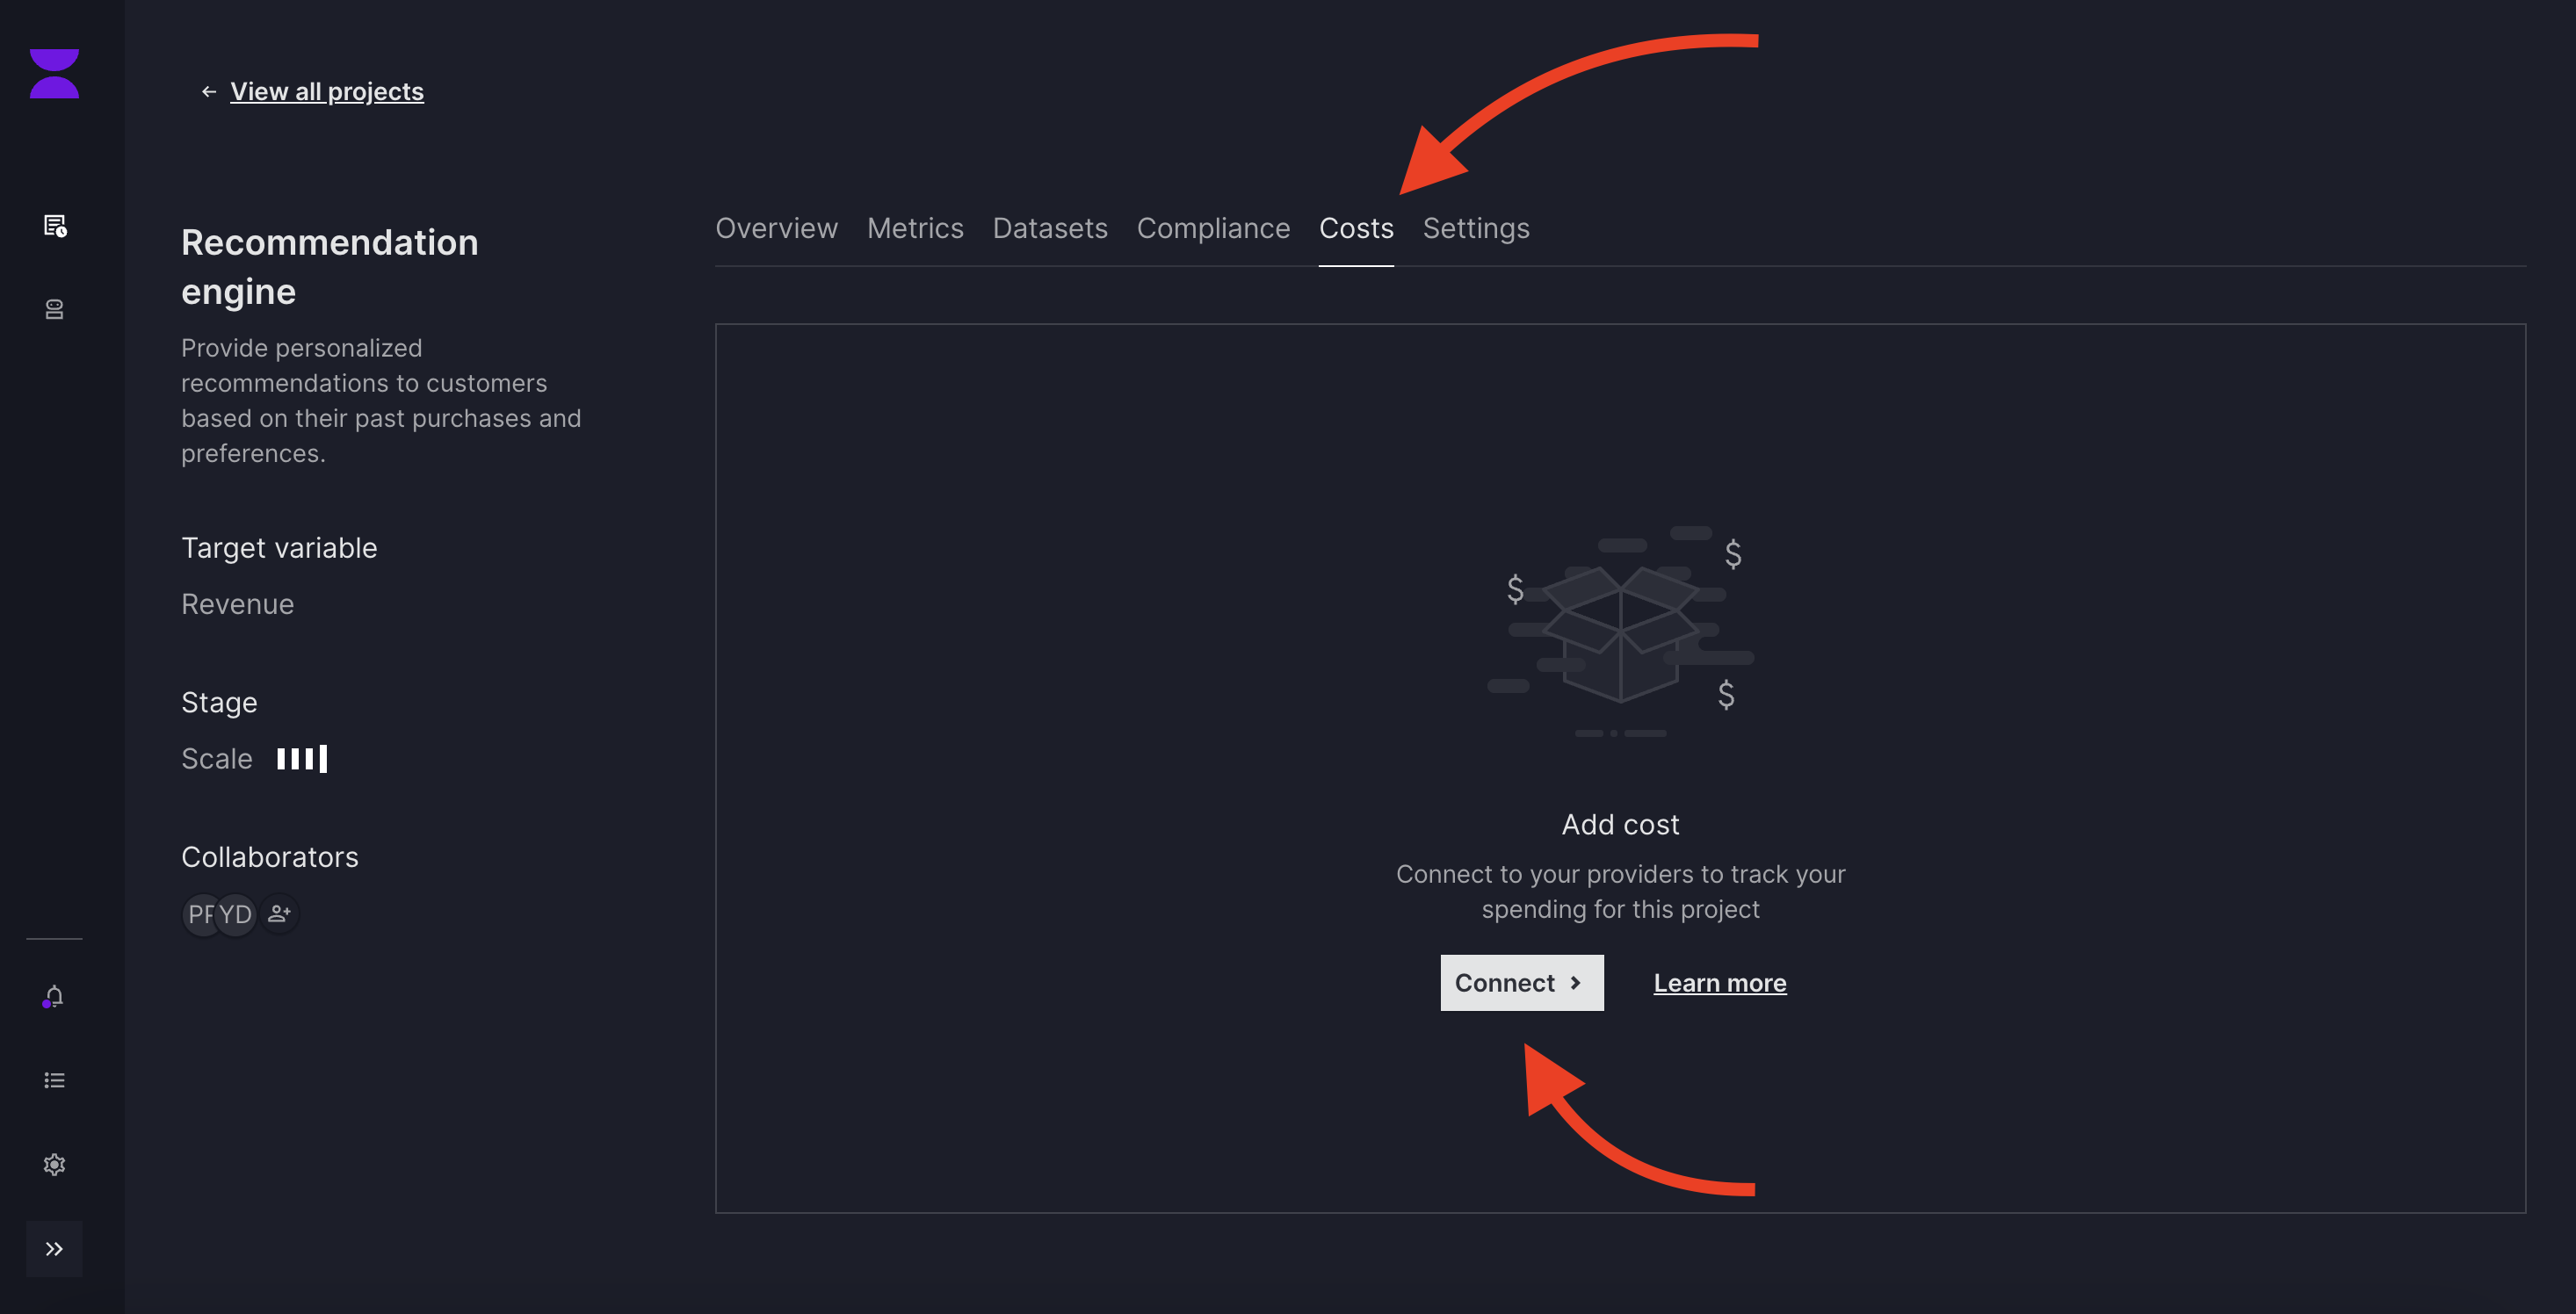
- Select project tile where we wish to add costs.

- Go to Costs > Connect
- add connection name and select provider
Azure, fill required details and then submit.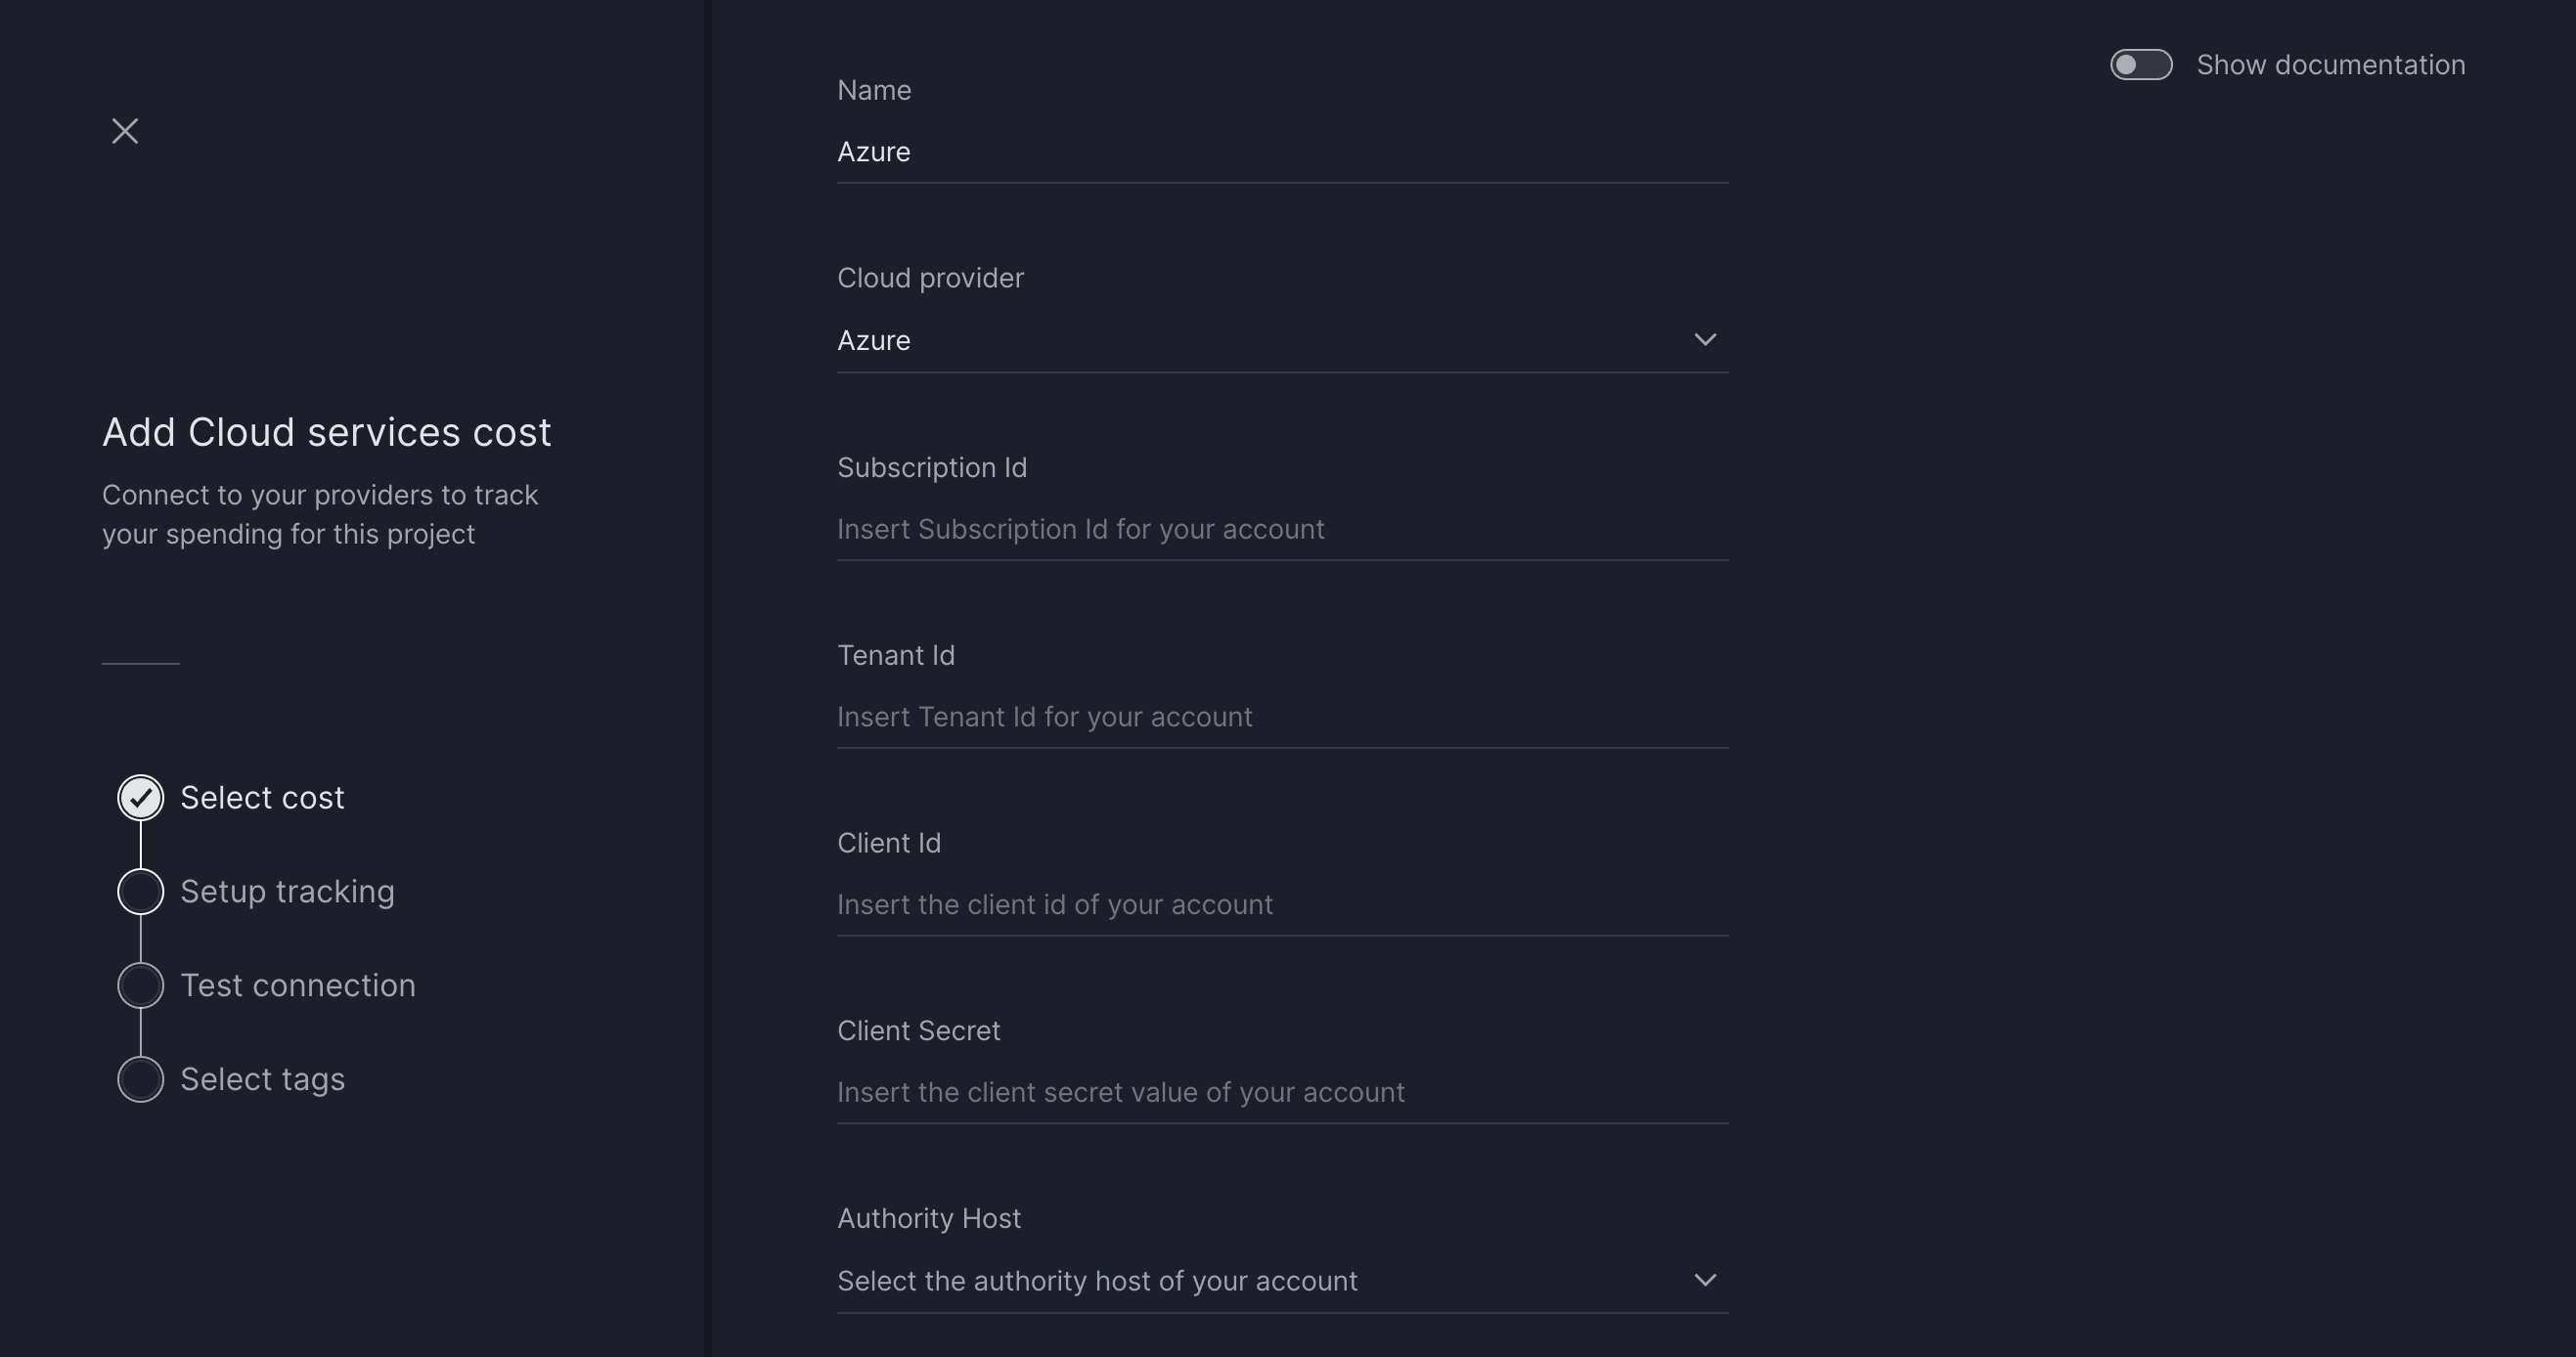
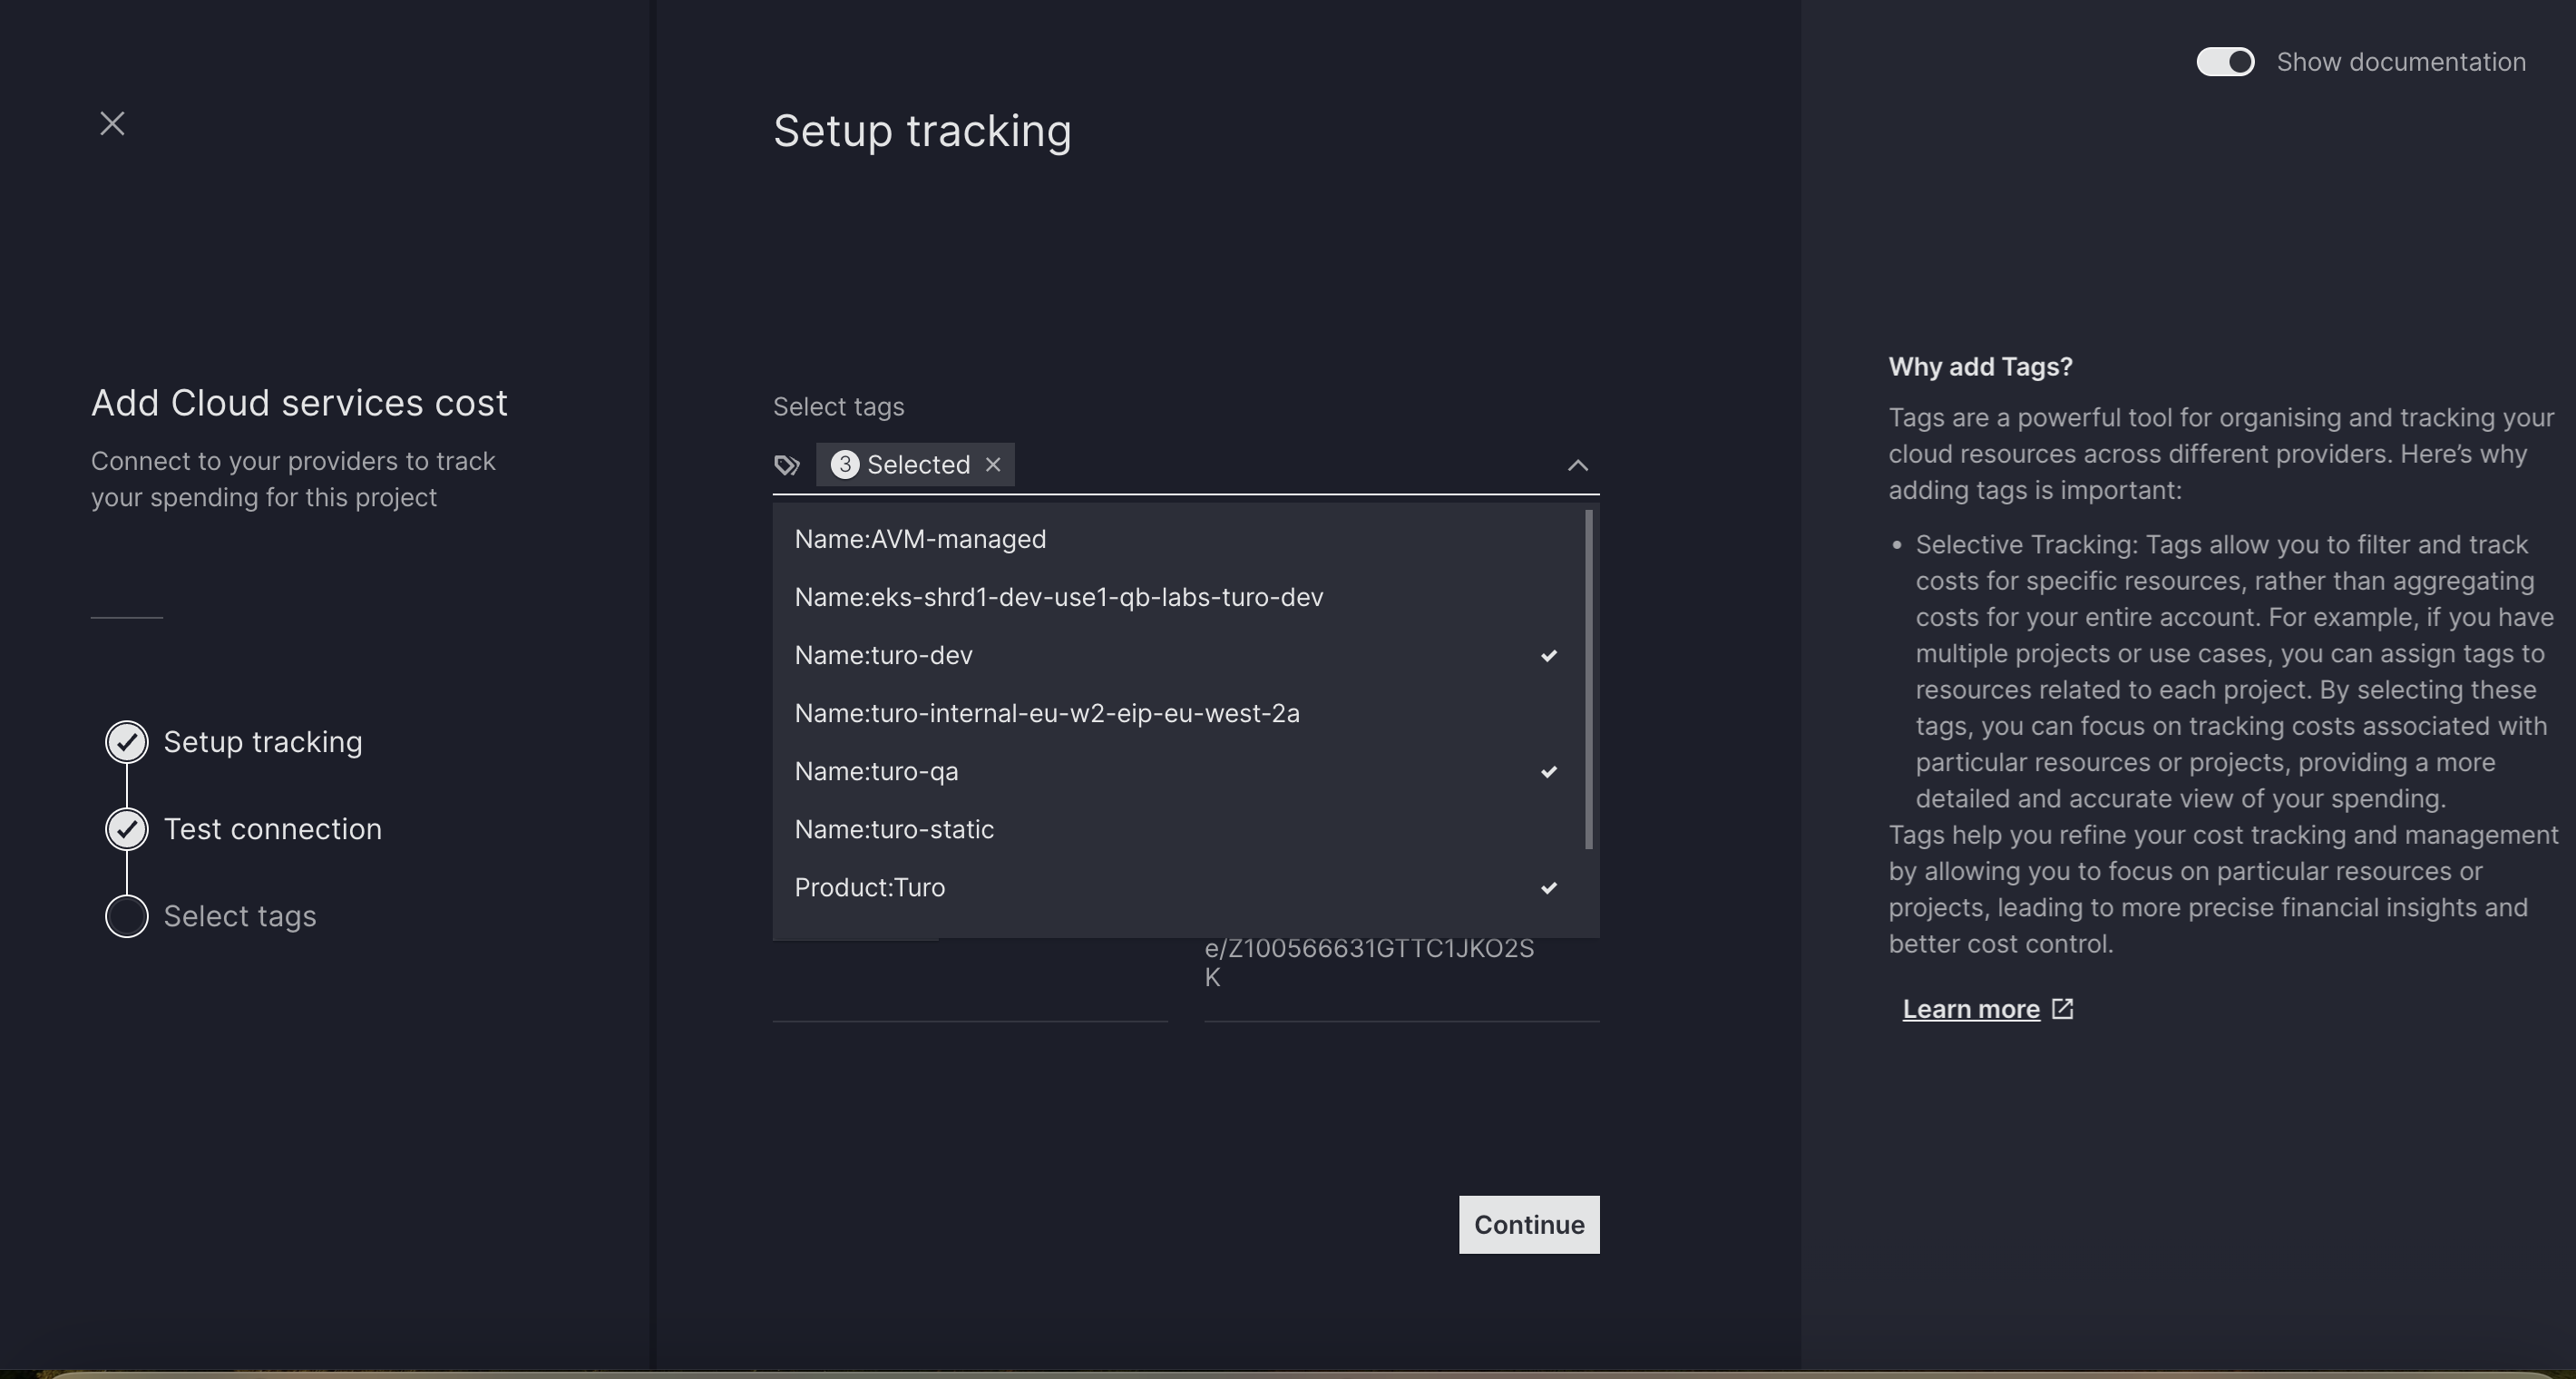
- System will do a
Test Connectionbefore we proceed. - Once test connection is success, select tags. (Turo will fetch cost data based on tags provided by user)
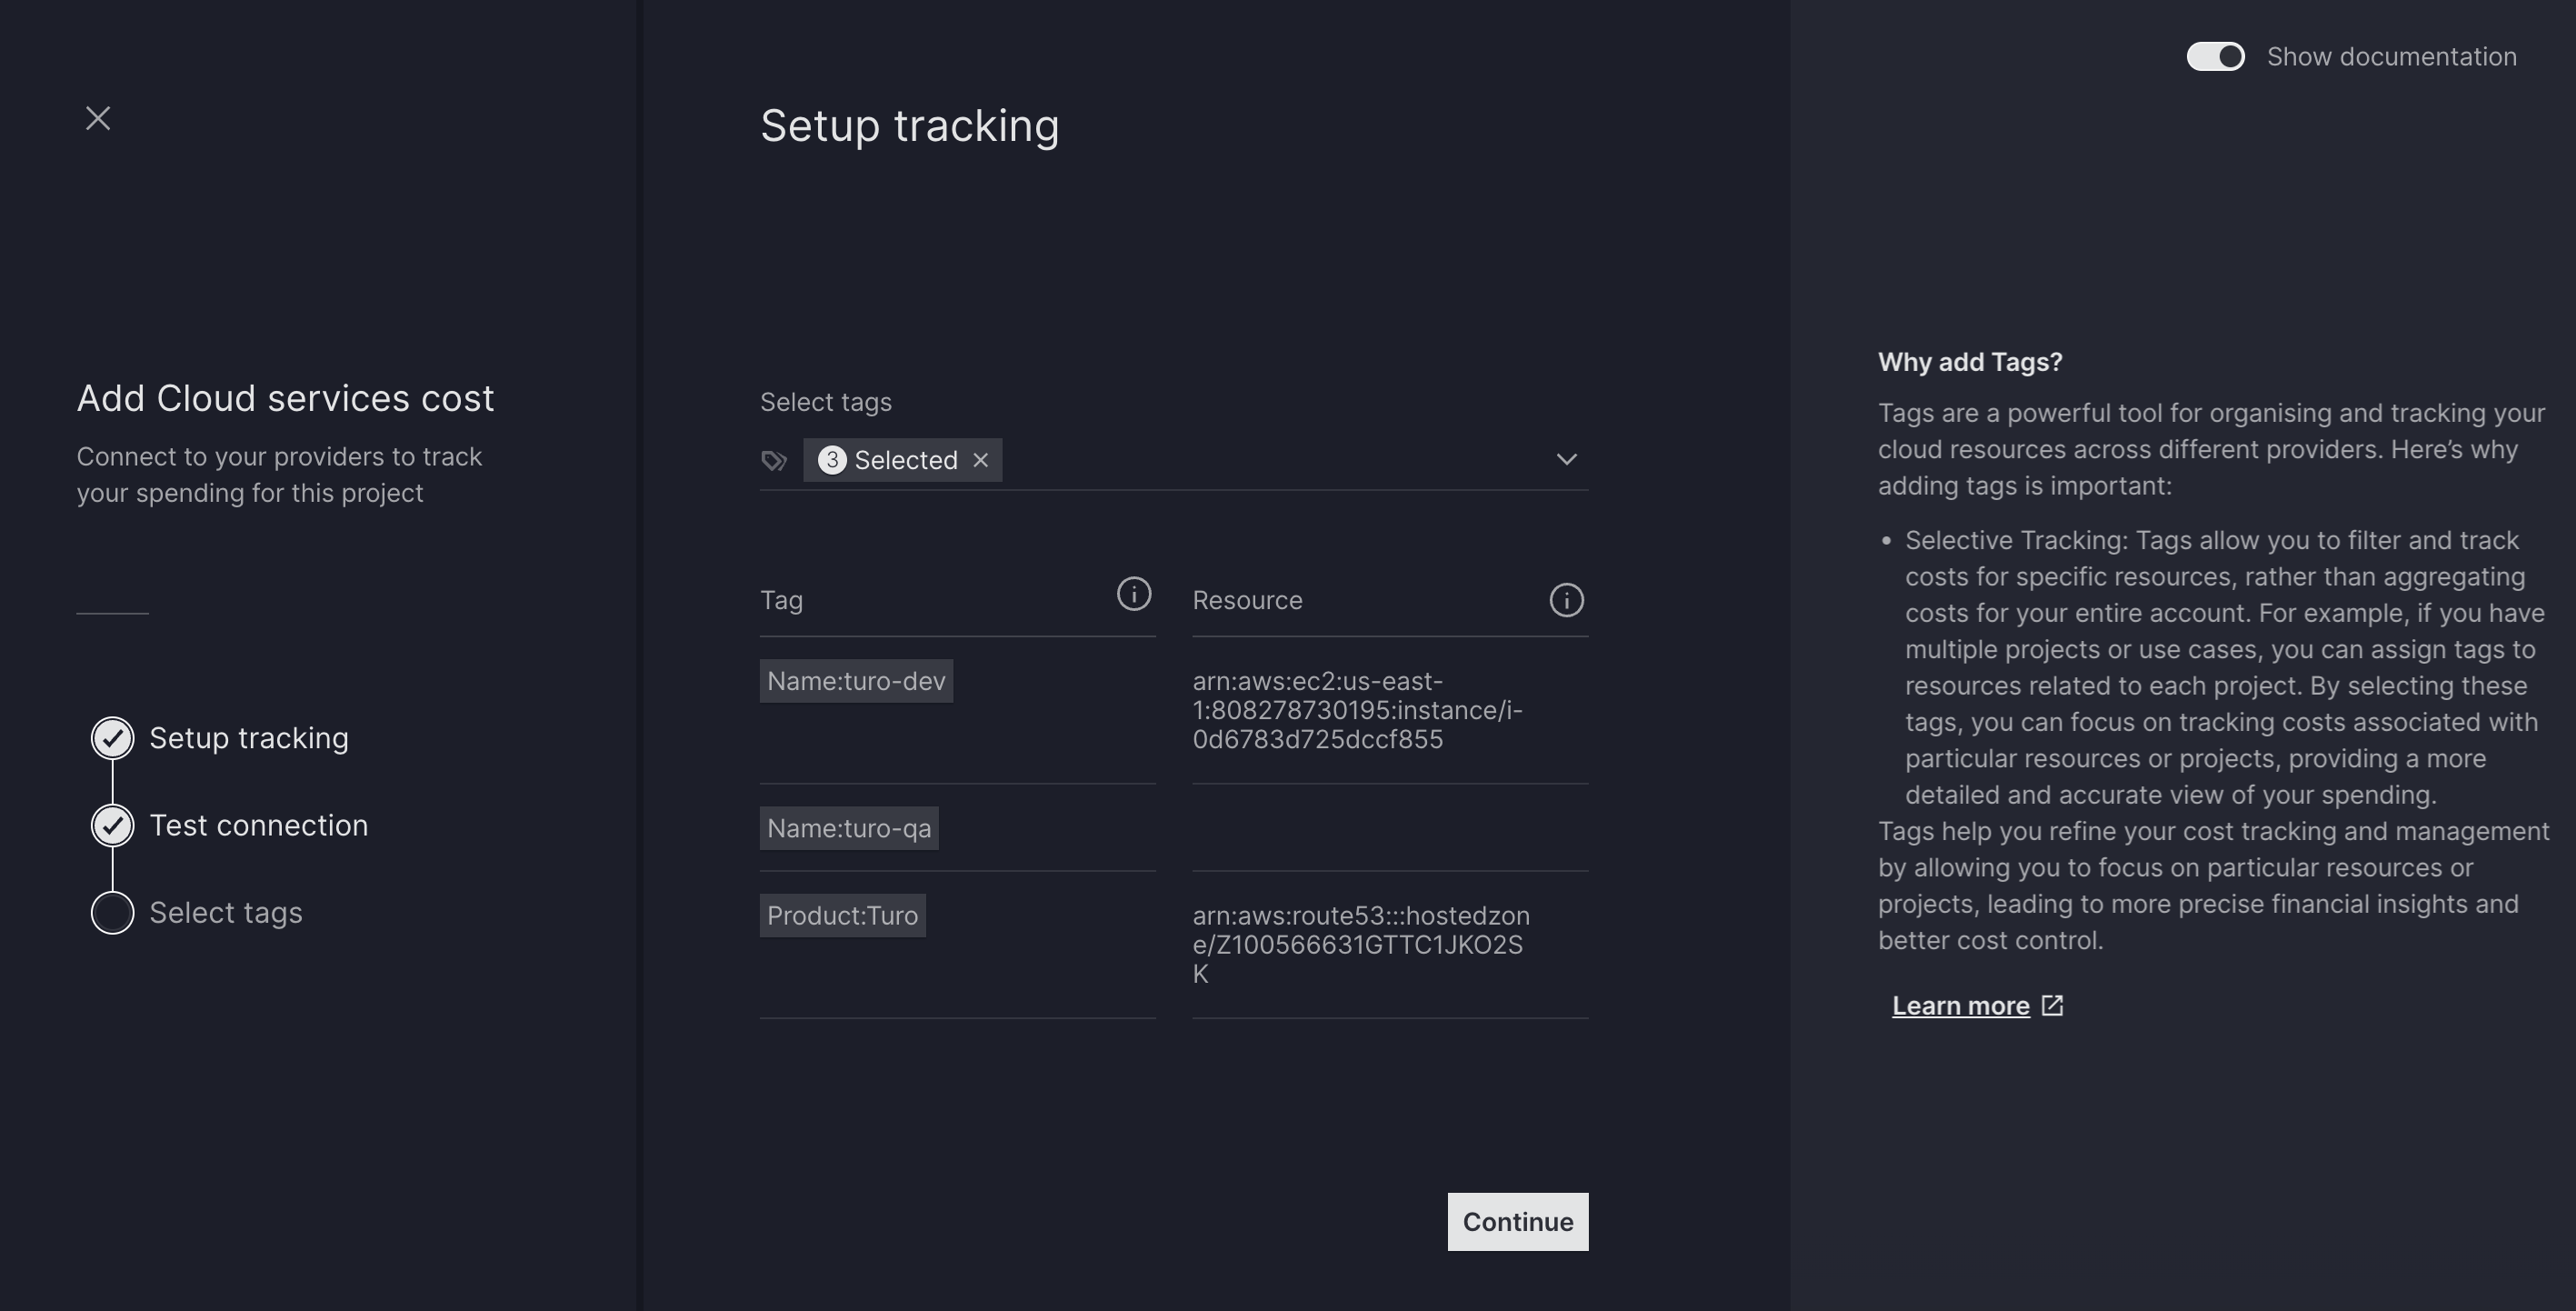
- Verify connection summary and submit.
